Monday, 30 October 2017

More Special Need Travel bed Hacks

Further tent ideas for travel bed Hacks

Many of you would have seen my travel bed Hack for a travel bed for less than $80.  If not check out the link here:
Travel Bed Hack for less than $80


Given how much room (queens sized mattress) my travel bed takes up, I'm always on the look out for other options.  I've seen a few more tents that may be suitable and therefore have perked my interest.  Note I haven't actually tried these but don't let that stop you if you think it would be good for your child.   Here they are and what I like (and don't like) about them.  I would like to also point out I am not affiliated with any other these companies.

Here is an OZtrail Blitz 2 Mesh pop up tent  - I've seen them at tentworld but am sure you can get them elsewhere


LIKE- easy to pop-up, no poles to have to put together.  Would need a blow up double mattress or to be able to slide a single mattress in.  Other ideas is to sew on something to tie it to the underside of a mattress and have it on top of a bed.  Ranges in cost from $60 (on special) to $100.  Lightweight - only wieghts 1.5 kgs

DON'T LIKE - you get in at the end, not the side which makes access difficult.  Wouldn't be suitable for really rough kids

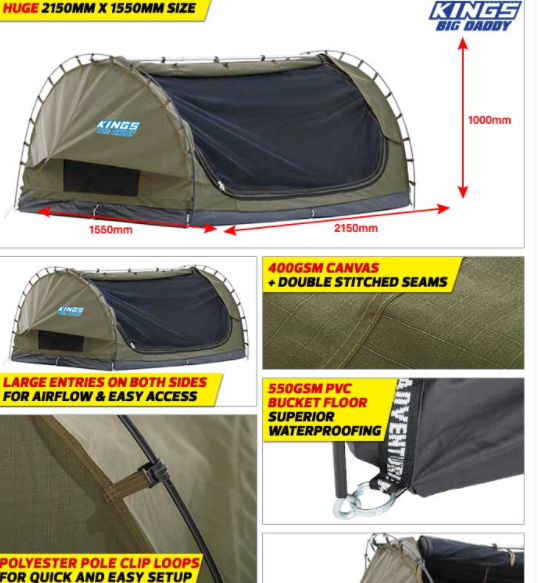
This  tent, I have no idea how I came across it but I did and felt compelled to share - costs more (around $200) - https://www.4wdsupacentre.com.au/adventure-kings-double-swag.html

\
LIKE- you get in at the side, comes with it's own mattress and it's not a blow up - double sized.  Looks sturdy (note I have not proven this). Has strong transport bag.

DON'T LIKE - Has poles,so would take longer to put together, heavy  (14.8kgs) and large to transport.  Not complete mesh


OZtrail Mozzie Dome 2 Tent - I've seen them at tentworld but am sure you can get them elsewhere


LIKE- you get in at the side, smaller than the one I use - you would need to add a blow-up mattress.  Has great internal height.  Reasonably priced - less than $100 on special, lightweight 1.9kgs

DON'T LIKE - Has poles,so would take longer to put together.  

Good luck and if you try any of these please comment on how you find them as it might help others.



Saturday, 24 June 2017

Another idea to keep warm

Some of you may remember my post on keeping warm in winter when blankets are not an option.  If you need to refresh your memory, here is the link Keeping warm

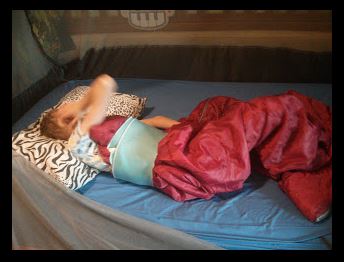
You may also  remember the below was one of my solutions.  It was a cheap sleeping bag with a physio strap around the chest to keep it on.   Unfortuantely, I have found Owen has started to wiggle out of this, so it is no longer effective.


I like the warmth provided by a sleeping bag and the length it provides, so I worked on a way to keep it on.  Here is the finished product:


So what is it?  It's a do it yourself toddler sleeping bag!  It's a sleeping bag with a polar fleece vest attached to the top.

What do you need:
  • Sleeping bag - I get the cheap ones from Kmart/Big W as they are for "warmer" nights/climates, which make them perfect for house temperatures (but not so for camping). Usually you get one for around $12.  Don't get the hooded ones. Also it will say hand wash only but I wash mine on a handwash/gentle cycle in the washing machine with no drama.
  • Polar fleece vest
  • Velcro (only required if you want the zip on the side)
  • Scissors
  • Sewing machine
Once you have your supplies think about where you want the zip of the sleeping bag.  Owen sleeps between his left side and his stomach, so we needed the zip on his right side for maximum comfort.  If he just slept on his back or sides I could have put the zip up the middle.  It would have looked funny at his feet, but that wouldn't have been an issue.

How did I do it?
  • I cut the armholes clear from the vest 
  • I then sewed the vest to back, middle, top edge of  the sleeping bag (making sure the sleeping bag zip would be on his right) 
  • I then sewed the left front piece of the vest to the front left of the sleeping bag meaning there was now an arm whole for his left arm.
  • I sewed two pieces of velcro on the right front edge, one on the vest and the other on the bag, so they velcro shut when placing him in.  If you have the zip up the middle you can sew the right front peice of the vest direct to the sleeping bag.
  • You will also see I trimmed the zip off of the vest and put the vest inside out.  I thought that might be more comfortable for Owen.


It is worth noting I am no "sewer", I don't have a fancy or good machine, so I did struggle with getting the tension right the thickess of the velcro and the sleeping bag, so don't look at my sewing and stitches, it is all far from perfect.  You could go all out and match the vest and the sleeping bag, but I just used a vest I had.

Here is how you put him in