Thursday, 29 October 2015

Making non perfect equipment, perfect

Sometimes it is hard to find the "perfect" piece of equipment for your child.  It might tick all of the boxes bar one.   If you find yourself in this situation ask if it can be modified to meet your child's specific need or consider what you might be able to do to modify it yourself.  Here are a couple of items I have "modified".

Kaye Height adjustable tilting table

I wanted a height adjustable, tilting table, with a cut-out for Owen to sit at and do school work.  Do you think I could find this height adjustable, tilting table, with cut-out (big enough for an 8 year old) in Australia?  I'm thinking winning lotto might have been an easier task.  I'm not saying there are none, I just couldn't find one on-line.   What I did find was the Kaye height adjustable tilting table.  It ticked all the boxes except the cut-out.  I looked at the on-line photos and noticed it looked like the top was plywood and attached by only a few screws, so I thought, why not get someone with a jigsaw to cut-out a "cut-out".  After more thought, I thought Plywood is cheap,  why not make a new top out of plywood and paint it black (to help Owen see things on the table more clearly).  The plywood was around $20, the paint aerosol was $10. A carpenter friend did the cut-out for me, I spray painted and my dad swapped the tops.  Owen is using it below. Now it is PERFECT for Owen.


Foot rest on Tricycle.

Owen has an awesome tricycle.  It has a parent handle, I strap his feet to the peddles and when I push him, the peddles go around.  This action strengthens his muscles and he learns to peddle................ Only issue is that sometimes we would be 10 minutes or so into a ride and he would decide he did not want to pedal any more.  Owen knows his own mind, if he doesn't want to do something, he does not want to do something.  You can imagine then, the fact that the peddles go around whenever the wheels are moving and there was no where else to  put his feet, caused a few issues.  It did not take me long to realise I needed some sort of "foot rest" for those moments.  There didn't seem to be many options, so  I went to a Brendale bike shop that sells speciality bikes (https://www.blindfreddyebikes.com.au/).  I told the owner I needed a foot rest and asked if he sold anything like that.  He didn't but put his thinking cap on and in just over an hour he had custom built the below foot rest for me.  It was just over $60.00 but made my life so much easier. I can thoroughly recommend him.


I am sure these won't be the last items I "perfect" for Owen and hopefully they may help you in some way.

Sharee


Sunday, 11 October 2015

Encouraging the use of Vision and Hands and Feet

Owen has limited vision and has had to learn to use his vision.  When he was a baby he showed very little visual response but now fortunately has learned to use his vision quite well (although still not entirely "normally").  He sometimes saw shiny things, lights, bright yellow and black and white. He was attracted to sound, especially bells and wind chimes and would turn towards them.  He did not seem to know he had feet or hands, let alone he could do things with them.  Owen and I attended Narbethong Special School ECDP playgroup and they introduced us to Active Learning and methods to encourage Owen to use his vision and learn about his body.  I'm sharing a couple of things I made to help him using my knowledge of what encouraged him:

Altered Baby A Frame

You will see from the below photo, I used our old A frame and covered the existing toys with various things like black and white fabric, shiny cardboard.  I added some chiming toys.  I bought Christmas tree decorations that were bells and sewed the bells on the bottom of the existing toys, so they made a noise when he accidentally hit or kicked them.  As he turned towards sound, he would turn towards the object, with the shiny fabrics etc.  This all gave him the best chance of seeing it.  If you have an older child and want to do this you could make an A frame out of PVC pipping.


Hands and feet

I don't have a picture of these but I also sewed bells to some black and white socks so his feet would make noise when he moved them.  I used to pop them on his hands too.  

Sensory Bib

This was another idea I learnt at Narbethong.  I made a sensory bib for Owen to wear in the car for the many trips to hospital's and other appointments.  He could also wear it in his stroller in the waiting room.  He wore it when we went to the park etc.  It was hoped he would accidentally find the items on himself and learn to go back to them.  The idea was permanence of the object, ie it remained in the same place even if he dropped in a million times.

To make it you need:
  • A larger sized bib or apron
  • Bias binding/elastic
  • Shower curtain rings (the little plastic ones that look like a sleeper earring)
  • Various sensory items and small toys

Sew on a tie for around the back (to tie up like an apron) with bias binding. Then use bias binding or elastic to sew on little loops (elastic means the child can put the item in their mouth), attach various toys and sensory items to the shower curtain rings and add them to the bib. Use it as often as you can.


Altering a Baby Mobile

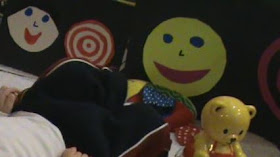
Unfortunately I don't have a picture of this but I made some black and white patterns (smiling faces, polka dots, checker board) out of paper plates and permanent markers (red and black) and attached them to the bottom of Owen's baby mobile, so he could  look up and see them when he woke up from sleeping.  I also made some cardboard pictures like the below to help him see and had him face them during tummy time.  The black background is to help him see them.

I know the road is long and hard but don't give up.  It can take a long time before you see the benefit of all of these things.


Sunday, 4 October 2015

Mealtime Bib Solution

What to do about bibs as they get older?  They don't generally fit baby bibs any more and adult/special needs ones tend to be expensive. I put bibs into two categories, one is dribble bibs for going out, drinking and just wearing all day and larger bibs for main meals.

You can barely see this square one.
Dribble bibs.   Owen is tall but quite slender so at this stage I still get away with using "baby" or "toddler" bibs.   Over the years I have tried many a bib and found my favourite to be the "Cotton On" ones, Owen wears the "Jill and Jack" square ones backwards so the towelling is what you see rather than the "baby" print (although I love the super hero ones and have been known to put them the right way around).   I also love their Kerchief/Bandanna style dribble bibs. They look good and don't scream "special needs"  They are not the cheapest bibs but they last. I find them absorbent and easy to wash. The Toy R Us Kerchief ones fit too but are not quite as
absorbent.  

Main Meal bibs.  This was the toughest 
one. I have tried the plastic bibs, painting aprons etc but I just found them awkward to wash and use.  It also got quite expensive to keep buying them.  I have tried the custom made adult style but I didn't like the feel of them and they are expensive too.  I have seen many people convert towels by cutting them in half and making a t-shirt style neck hole but I hate pulling things over Owen's head (well it is mainly the taking off after he has dropped his dinner all over the bib).  Oh and I am not a fan of sewing either.  I did like the idea of the towelling, so I bought some inexpensive hand towels and a small bib holder clip (like they use at the dentist) from Independence Australia. I then hold the hand towel in place with the clips (see photos). I am sure there are heaps of versions of the clips, with differing lengths etc so  just make sure the length you get matches the size of your child.  When the bib has been used and abused too many times, it is cheap to replace. Easy to shake, rinse and wash.